Rainbow Bright
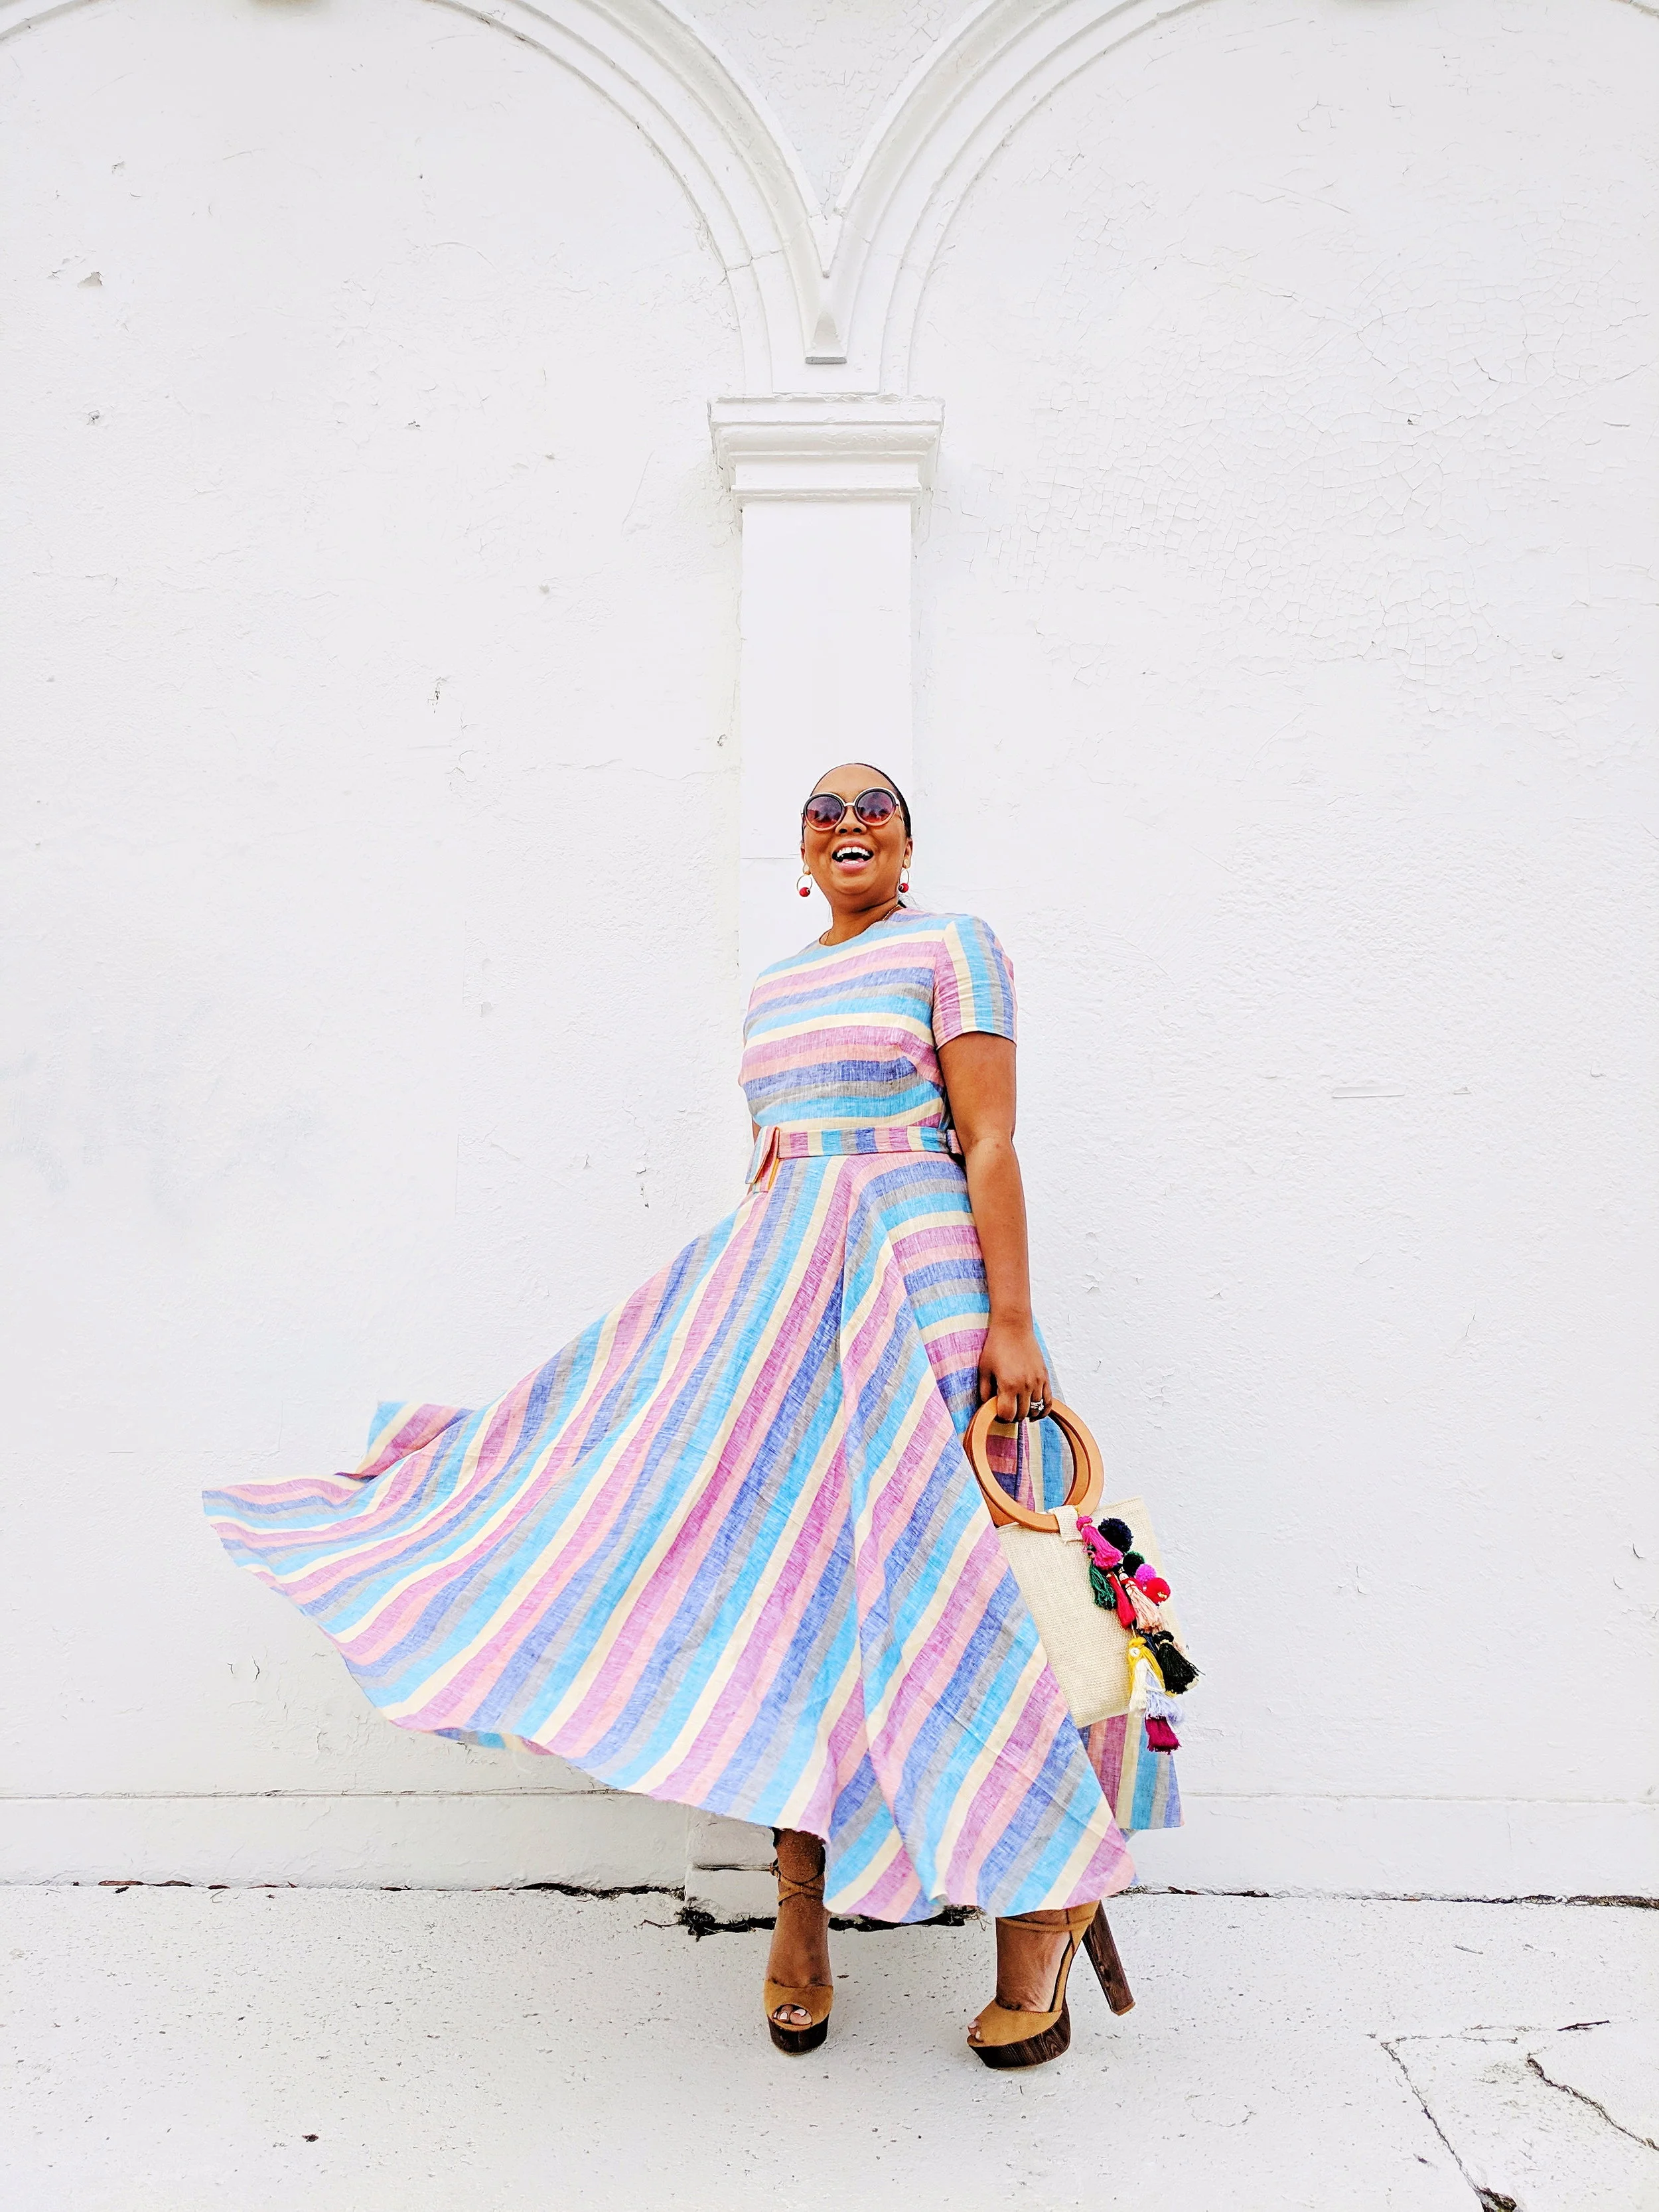
When creating this look, my first thought was, “I want to make a fan pack aka bum bag aka belt bag!” But of course, you know me all too well. I had to find a way to level it up. So, why not create an entire look around my mini bag…..literally! LOL!
So for the dress, I used Vogue Pattern 9197. I used bodice portion of this dress. For the skirt, I simply created a circle skirt and attached it to the dress. The back includes an invisible zipper closure. Now of the belt bag…. this was such a special addition to this dress. Want to know how I created it? Here is how:
Materials
Outside Fabric: Linen
Lining: Canvas
809 Interfacing
Belting (Make sure the width of the belt fits in the D-rings and length should wrap around your waist)
D-Rings
Iron
Ruler
Instructions
Create pattern for bag in accordance with Diagram A
Cut out lining, outer fabric, and two pieces of interfacing using bag pattern
Iron interfacing onto both outer fabric and lining
Sew the bag right sides together, leaving the bottom open. Turn right side out and press.
Fold 1/2 inch of fabric to inside and top stitch as close to the edge as possible.
To create belt, you should have two belts. One should be longer that the other by 6 inches.
For the belt cut out fabric to over belts as described as below:
Width: Measure 2x width of belt + 1 inch.
Length: Full length + 1 inch
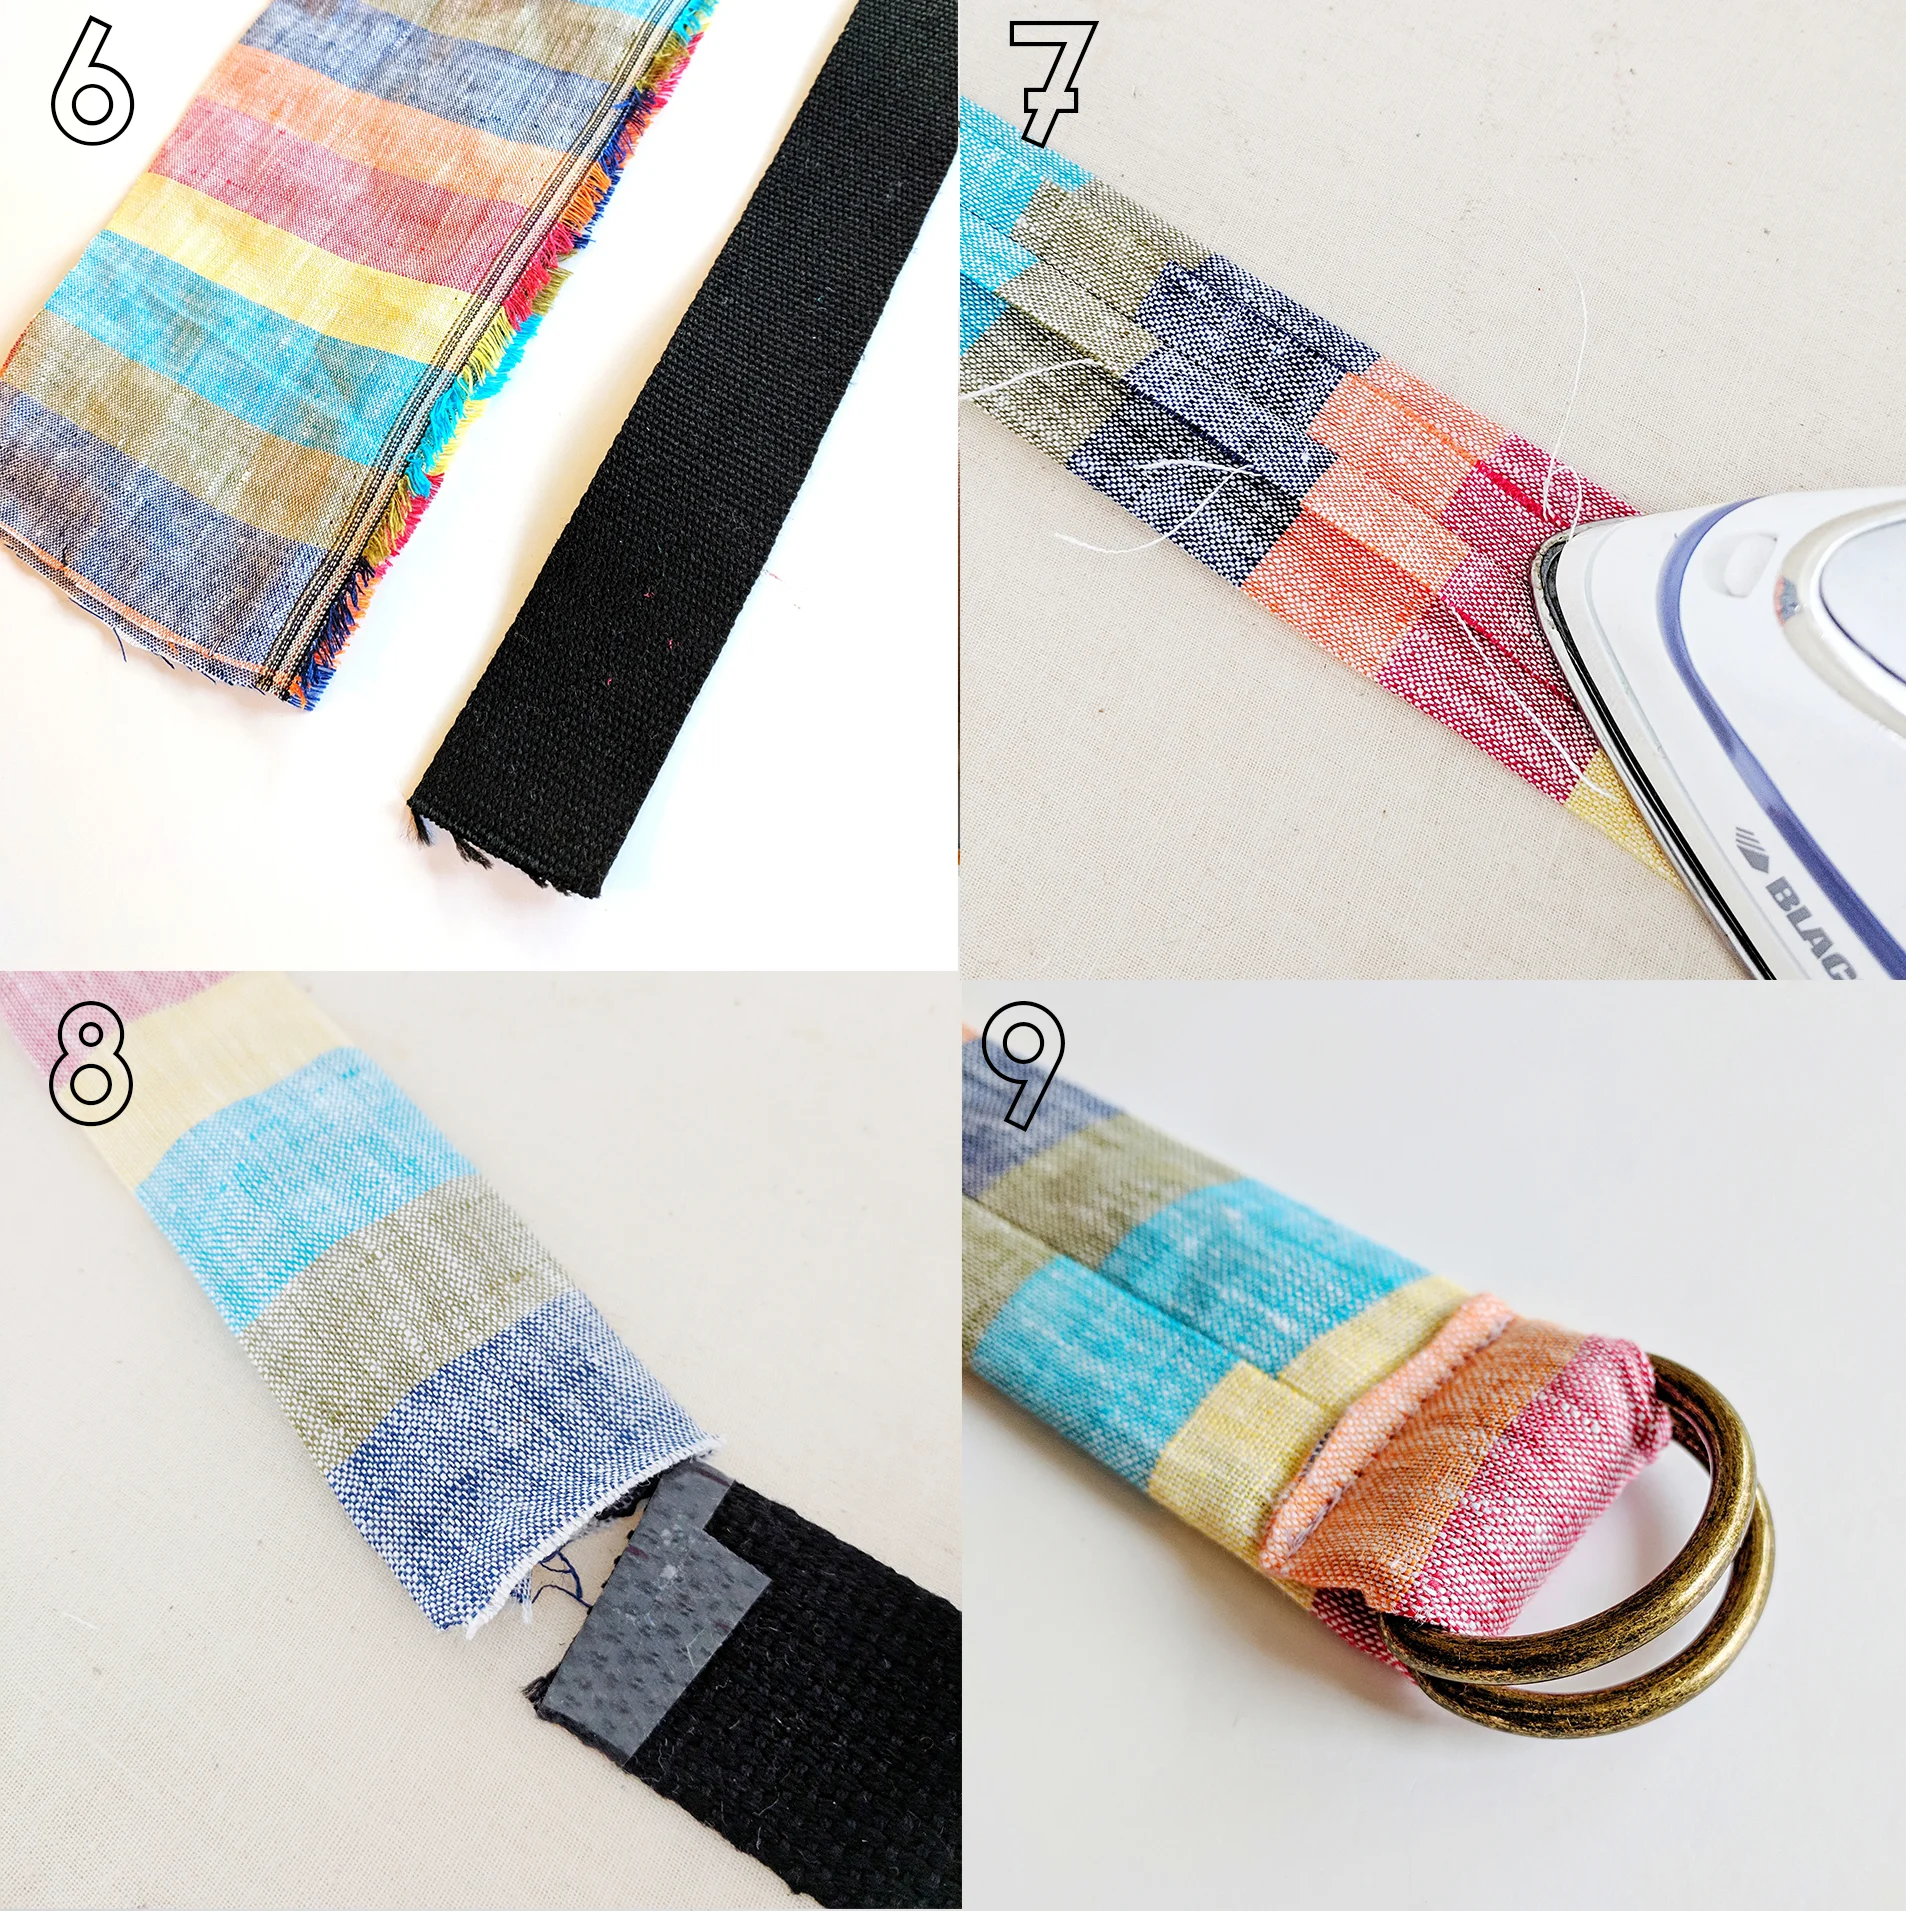
Fold belt covering, right side together at 1/2 in. seam. Press open seam. Close one end of belt by sewing 1/2 in seam allowance and trim excess. Turn belt covering right side out. Slide belt into open end of belt covering making sure the seam is facing the back NOTE: This will not be an easy process. It is quite tedious. Just be patient.
Cut 1/2 in. off end of belting. Continue sliding until there is about 1/2 excess fabric left hanging. Fold in the end of fabric. Press. Place two D-rings onto the end and topstitch in place.
So, one belt will have one set of D-Rings and the other belt will be plain.
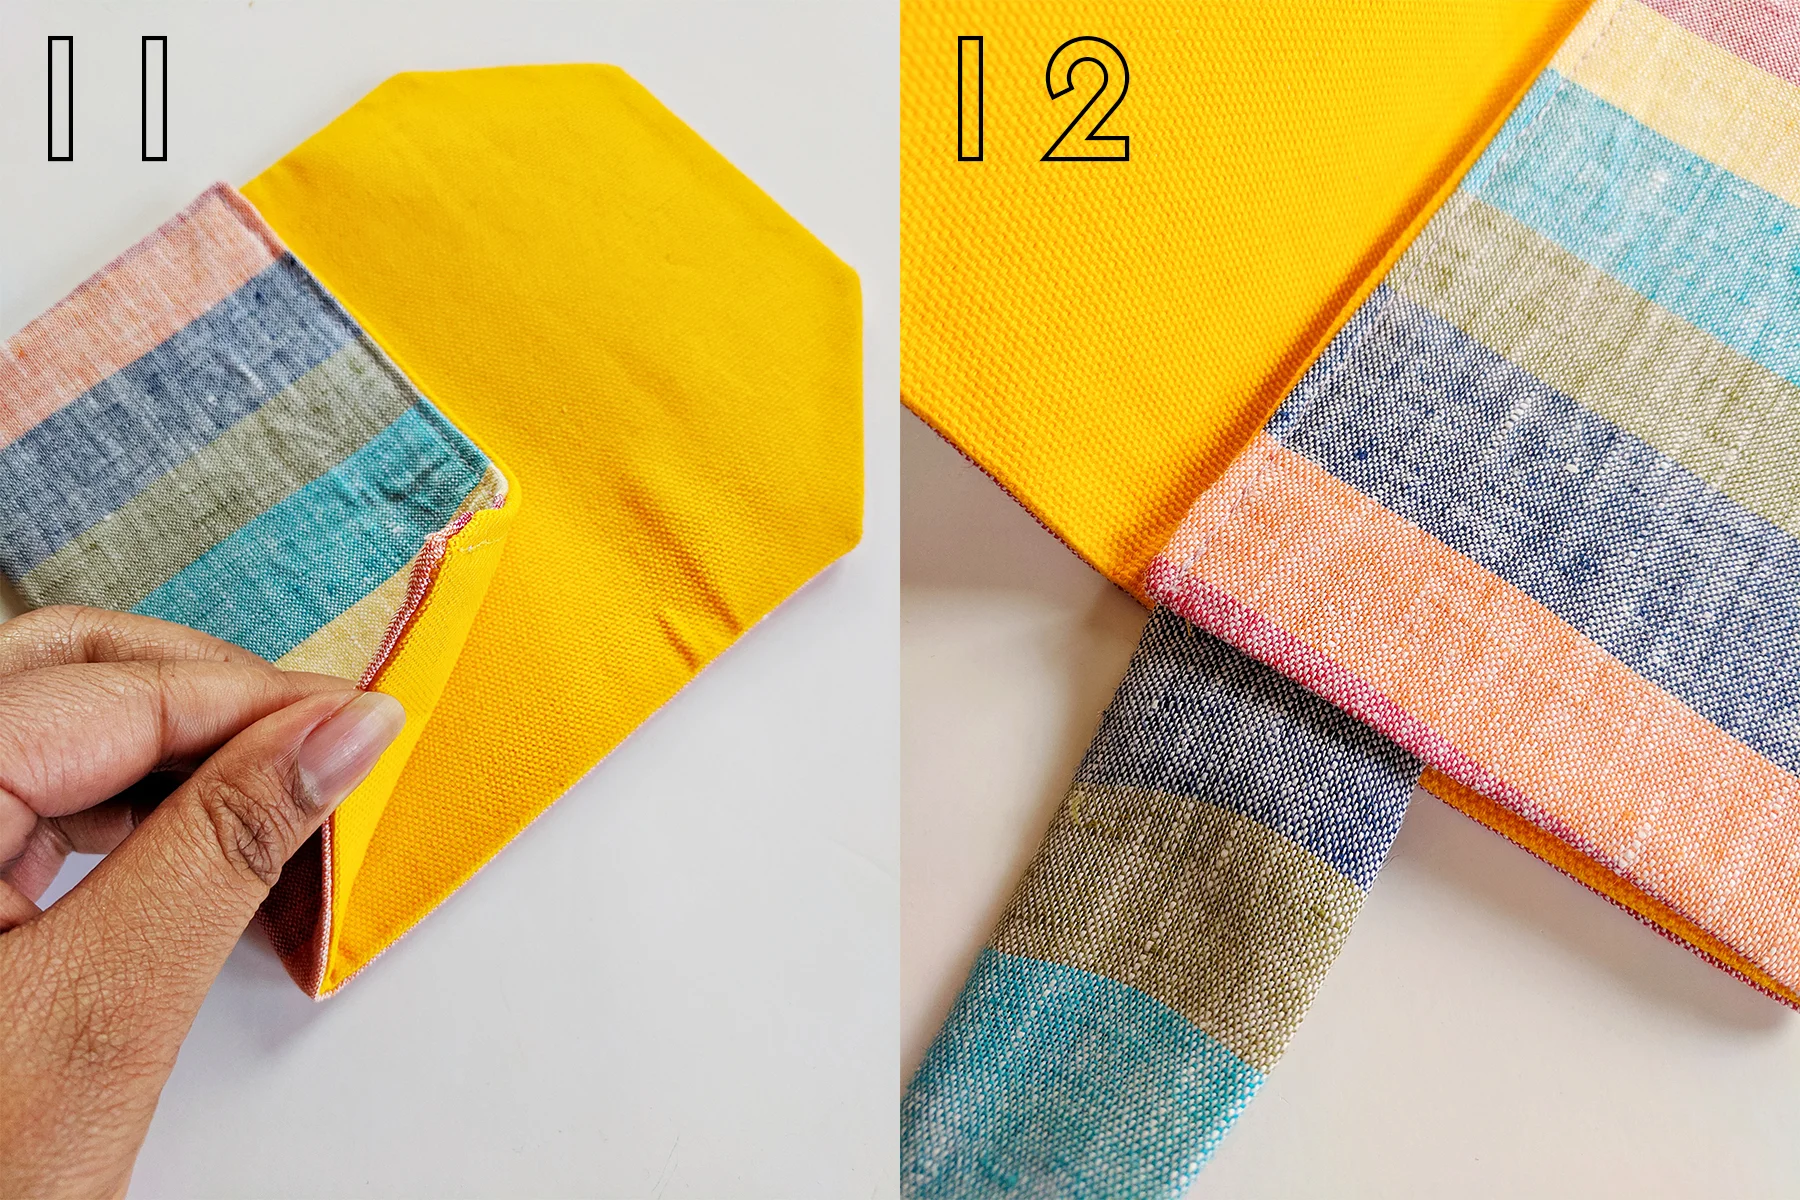
Fold bag into thirds to form your bag. Press.
Then open top flap and pin straps in place. Starting at the right bottom corner, top stitch. Top stitch up the sides to seal bag closed and seal the strap in place. Continue top stitching around top flap edge and then come around to opposite side and stitch opposite strap in place and finish at left corner.
For closures, you can use velcro or snaps. I would recommend snaps.
That’s it. Your’e done!


